I'm going to start this post with a defence of my pronunciation of "chroot" as a single word, not "c-h-root" or whatever. I believe it should be pronounced this way for three reasons:

- Unix/Linux commands and computer acronyms are commonly pronounced as words. "grep", which is a contraction of the g/re/p command, is pronounced as a word, as are many even less plausible acronyms. Try saying "s-c-s-i" instead of "scuzzy" in a computer lab and be prepared for the derisive laughter.
- I think the chroot command was intended to reference the cheroot, a kind of inexpensive cigar also known as a stogie.
- It is much easier to say. Why would you make work for yourself by saying a one-syllable word as two or three syllables?
The rest of this post is a more in-depth technical discussion of my easy-chroot package, targeted at developers, those wishing to easily mount partitions and image files, and those wishing to try out new linux distributions and environments with a minimum of hassle (no rebooting, partitioning, etc). Easy Chroot: IntroductionI have packaged the scripts for the mount-and-chroot system underlying my Easy Debian package into a separate package I call "Easy Chroot". I have also included the drivers (
compiled by Matan for me) to do the "turbo loop," which allows a mounted image file to be accessed at nearly the same speed as a partition.
I have created (with lots of help from lots of people) a set of scripts that are very generic, and can be used independently or together to build and run various kinds of "appliances" or OS replacements, without any direct impact on the host OS.
The Scriptsqchroot:This is the all-in-one core script.
Provide it with an image/partition, a mount point, and a command, and it will do the rest... (
But it runs the commands it is given as root inside the chroot, which is often not what you want. See the quserchroot command, below, to run chroot apps as non-root.)
The first parameter is the image file, the second parameter is the mountpoint, and the rest of the parameters are passed to the chroot and run there. There's a lot of magic going on under the surface here, so let's look at what's going on "under the hood."
The qchroot script can be broken into three parts;
mount,
bind,
chroot. The mount portion is handled by
qmount below, so we'll look at the binding and chroot portions.
- Binding: After a partition or image file is mounted, it isn't very useful for the kind of chroot we want here. A basic chroot is sometimes referred to as a "jail", because applications run in the chroot filesystem can't "see" anything outside of this filesystem. This means none of the devices, media, temp directories, nor even the user's home directory can be accessed while "inside" the chroot. That's why a careful use of the "mount -o bind" command is required. It mounts directories from the parent OS in the chroot, too, so applications in the "chroot" can "see" them. Mounting the /dev directory makes most of the devices connected to the system visible, and mounting everything under /media allows the chroot access to SD cards and attached external media such as USB drives. This also allows chroot apps to share the X display and desktop manager, so they appear to be running on the Maemo desktop. The qchroot script also mounts the various temporary directories, so that applications can communicate with applications in the parent OS. This means GTK apps inside the chroot can invoke Maemo's stylus keyboard when a text field is tapped. It also means a chroot app can open an e-mail attachment from Modest.
- Chroot: This is the primary purpose of all of these scripts, and in the end, it is one of the most simple and straightforward parts. The qchroot script makes sure that exiting the chroot, however that happens, resets things gracefully as possible, but the actual chroot is a simple one line command. It really is the mounting and the binding that make the chroot a workable virtual environment.
userchroot: The userchroot script is only a thin wrapper around qchroot. This script, however, isn't run as root; in fact it will fail unless it is run as non-root. The userchroot script inserts an extra "su user -c" before the commands to be executed inside the chroot. It takes the same parameters as qchroot.
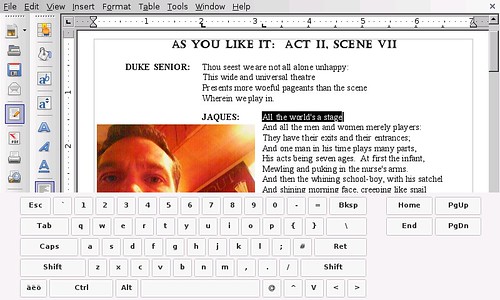
For example, let's say you have an image file on your SD card containing, among other things, OpenOffice.org. You would run the following command (as user, not root) to open a document in oo writer:
userchroot /media/mmc1/ubuntu-ooo.img.ext2 /opt oowriter "/home/user/MyDocs/resume.doc"
Hey! Look at that
splash screen! You're starting up OpenOffice Writer!
qmount: This script does some serious heavy lifting. It is called by qchroot to mount the image file or partition. It takes the first two parameters of the scripts mentioned above; the image/partition name and the mountpoint. A lot of my best scripting is in here, and this is also where I needed the most help from outside.
The qmount script checks to see what it is you are trying to mount, and if you are mounting an image file (a file that contains a filesystem, like an ISO file, except it is read/write), it will use the
dmlosetup app (
thanks Matan!) to mount the image file; this improves read/write speed dramatically, and makes the image file almost as fast as a dedicated partition.
You can use this script to mount an image or partition, if all you want to do is mount it (and not chroot into it). A partition mounted with qmount is not suitable for chroot however.
closechroot: This script is one of the best things about running applications in a chroot. By running this script, you can kill all of the chroot applications in one blow. No hunting around trying to find stray processes. The closechroot script is also very important to run if you want to delete or move the image file that you have mounted, because the dm-loop doesn't "let go" of the image file when you just unmount it.
The closechroot script takes one parameter, the directory where the chroot is mounted. It then kills the chroot applications, unmounts all of the bound directories, and then unmounts the image file or partition that you mounted.
qumount: This is the script that does the unmounting for closechroot. It can be used independently if all you want to do is unmount a partition or image file. Don't use qumount to unmount a fully mounted chroot, however.
synchroot: This script doesn't need to be run very often. It copies several configuration files from the primary system to the chroot, so that the two environments are "synched". This is important for things like time, user permissions, keyboard mapping, and networking. The files that are copied are the following:
- /etc/hosts
- /etc/resolv.conf
- /etc/group
- /etc/passwd
- /etc/localtime
- /usr/share/X11/xkb
The files in the chroot are backed up with a date-based extension, so you can restore your chroot file system if synchroot breaks something.
Some Support HacksThere are a few extras thrown into the easy-chroot package to make it easier to run non-hildon applications. Here's a quick overview of them.
Movable Dialogs Hack: Thanks to
qwerty12 and
Matan, you can set your dialogue boxes to be either movable or static (the default). Movable dialogues are often needed when running desktop applications which can have huge dialogue boxes for settings, etc.
Processor Speed Hack: Thanks to
lcuk and
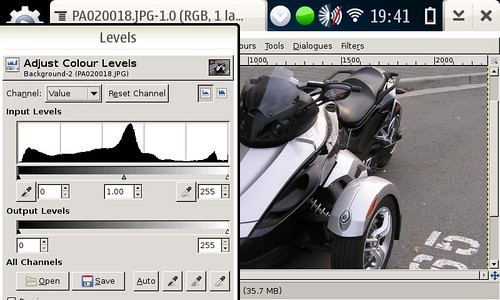
others, the /sbin/cpu-ondemand and /sbin/cpu-perform scripts (and associated menu items) set your processor to either "on demand" mode (processor speed drops when cpu is idle) or "performance" mode (processor speed is locked at full speed). Due to very aggressive definitions of "idle" in the Maemo system, the processor often scales back to half speed when it isn't appropriate. This can have a noticeably negative impact on processor intensive applications (like Gimp and OpenOffice, etc). By setting the processor to "performance", you can dramatically speed up many of these big, slow applications.
Host Window Hack: Thanks to
Bundyo, this little app (/usr/bin/hostwin) can be used with the Xephyr nested X-server to run a secondary desktop (yes, a complete desktop, like Gnome, or KDE, or
anything) as a
window on your primary Maemo desktop. See the link above to the ITT thread discussing the program's use.
Installing The Packageeasy-chroot can be found in the diablo extras repository. Install with the Application Manager or apt-get install easy-chroot or make it a dependency of your project.
Labels: chroot, debian, internet tablet, maemo, n800, n810, nokia, open source