Thursday, November 11, 2010

N900 Meego chroot part 3: polishing the process

In my first post in this series, I walked you through making a Meego chroot image from the raw images provided by Meego. In the second post, I gave you some rough scripts for starting the Meego UI in a Maemo chroot with the assistance of Easy Debian. In this post I'll present my new Meego image with the newest Meego UI and all the pieces installed to run without Easy Debian. I also present new scripts that streamline and improve the process.

The Image
I have posted a new Meego image (lzma compressed) on qole.org for you, meego_1_1_b.img.ext3.lzma. This image has been updated with newer components, and so the UI looks a bit different, and I have installed Xephyr and xbindkeys. I have also copied over wmctrl and the keyboard focus binaries. These pieces now make it possible to just use the Meego image to do everything, without opening the Easy Debian image at all.

The Scripts
I have posted new scripts, meegoscripts2.tgz:
  • I have improved the chrootmeego script to use variables, so you can customize how you run Meego.
  • I have added a new syncmeego script that copies over the necessary files from Maemo to Meego. I got most of this script from this Meego wiki page, and I honestly don't know what effect the copied files actually have on the chroot (except the resolv.conf file, which we already knew about).
  • I have enhanced the startmeegoui script, now called startmeegoui3. This script now starts the Xephyr nested X-Server inside Meego, gives it keyboard focus, and then starts the Meego UI. 
  • I have added a new script, gomee (clever name, eh?), that opens the Meego chroot, syncs it, and then starts the Meego UI.

Some interesting bits in the startmeegoui3 script:
export M_USE_SOFTWARE_RENDERING=1
R. Burchell was kind enough to point out after my second post that this environment variable makes all Meego apps start with software rendering. Apparently, that was all that stood in the way of getting most of the Meego apps to run.

/usr/bin/mdecorator -software -remote-theme 2>/dev/null &
echo "sleeping..."
sleep 10
echo "...ok now"

/usr/bin/duihome --desktop -software -remote-theme 2>/dev/null &
The bold lines are new. Adding the sleep command seems to fix the strange white band that was appearing across the top of the Meego home screen. I'm not sure why, but it works, so... there you go.


Still To Do

The media apps (photos and videos) do not work yet. More precisely, they work, but they can't find any media. I suspect that someone needs to show us how to start the media indexer to get them working.
The phone app doesn't work. If you try to start it, it complains about ofonod not being started. If ofonod is started, then the phone app just never starts at all.

Labels: , , , , ,

Saturday, November 06, 2010

Running Meego Handset in an N900 chroot with Easy Debian: Part 2

In this post, I show you how to start the Meego Handset 1.1 "desktop" in a Maemo chroot, using Easy Debian and the image file you made using instructions in the last post.


DISCLAIMERS:

This is a very shaky process. It is in no way ready for use in any way other than "Oh that's cool!"

The animations on the desktop are very slow, and none of the applications seem to work except Fennec thanks to Robin Burchell, the applications all work now. Please update your scripts!

The Prerequisites:
  • You have a working install of Easy Debian on your N900, and you can start the LXDE desktop in a window.
  • You have made the image from the last post, and you have put it in your /home/user/MyDocs folder.

Quickstart:

I have written four little scripts that semi-automate the process of starting the Meego UI. You can download the zip file containing the four (updated!) scripts here at qole.org. You must put these scripts in the /home/user/meego directory, or edit the scripts to look in another directory.

Put the scripts in the MyDocs folder of your N900 (that's where they'll download if you just choose the root "N900" folder when downloading from the N900), and then, at the Maemo terminal prompt on your N900:

~ $ tar xzvf MyDocs/meegoscripts.tgz

Then:

~ $ cd meego
~/meego $ ./debmee

Hopefully, that's all you have to do to get the Meego 1.1 desktop to start up on your N900. Read on for more details of what's going on "under the hood."
Read more ยป

Labels: , , , , , , ,

Monday, November 01, 2010

Running Meego Handset in an N900 chroot with Easy Debian: Part 1

I would like to document my process for getting Meego Handset to run in a Maemo chroot on the N900 using Easy Debian, so you don't have to multi-boot your phone.

But I can't document everything in one post, and I'm documenting as I go, so this first post will be the just first steps: how to get an Easy Debian compatible image out of the raw Meego images that the Meego project is posting.

I do these first steps on an Ubuntu desktop machine.

1. Download the latest Meego Handset image. I got mine from the builds directory of the Meego repository, here:  http://repo.meego.com/MeeGo/builds/

The file you are looking for ends in .raw.bz2 and you can get to it by choosing the biggest numbered directory twice, then going into .../handset/images/meego-handset-armv7l-n900/  and downloading the .raw.bz2 file.

This is the one I'm using.

2. Unzip the file on your Linux machine.

I recommend becoming root for the entirety of this procedure. I suggest doing it before you even unzip the file. I had problems unzipping the file as a regular user, and this may have been my problem; I don't know, but what can it hurt to gain root right away?

sudo su -

Unzipping the file is pretty straightforward on a Linux command line:

bunzip2 meego-handset-armv7l-n900.raw.bz2


In these instructions, I'm going to call the meego file "meego-handset-armv71-n900"; substitute the longer version as necessary.

3. Mount the Meego rootfs partition on loop. This is tricky, because the raw image has multiple partitions and so you have to use a little trick I found on the 'Net, here.

a. You need to first create a directory to mount on. I created /media/meego:

mkdir /media/meego

b. Now mount the first partition. First check to see where the partition starts:

fdisk -lu meego-handset-armv7l-n900.raw

See where the first partition starts. Multiply that number by 512, and use it as the offset. In my case, it starts at 1 so the calculation is easy. It is just 512. This will probably stay the same for future releases, but it might change. Better to document this, just in case.

mount -o loop,offset=512 meego-handset-armv7l-n900.raw /media/meego

4. Now make a new image file that will just have the Meego rootfs in it, so it can be mounted properly by Easy Debian. I made my image 1GB, but you can make it bigger if you want.

dd if=/dev/zero of=meego_1_1.img.ext3 bs=1024 count=0 seek=$[1024*1000]

You have to format the new image file! I used ext3.

mkfs.ext3 -m0 -L meego1_1 meego_1_1.img.ext3

5. Mount the new empty image file. I made a mount point, /media/meego2, but you can use whatever name you want.

mkdir /media/meego2
mount -o loop meego_1_1.img.ext3 /media/meego2

6. Copy the Meego rootfs to the new image file you created. Substitute the correct directories here.

cd /media/meego
tar -cf - . | ( cd /media/meego2 ; tar -xpvf - )

7. Unmount everything.

umount /media/meego
umount /media/meego2

8. Copy your new Easy Debian compatible image file to your N900. I would suggest using the USB cable, but there are lots of ways to do this. You can also zip up your file to keep a safe backup.

Next post:

I'll try to post again soon with directions for getting the Meego Handset UI started under Easy Debian's Xephyr nested X server.

Labels: , , , ,

Monday, June 07, 2010

N900 Easy Debian, After PR 1.2

Executive Summary: There's a new version of Easy Debian in Extras-testing that has a much better method for getting the keyboard working in LXDE after the PR 1.2 firmware update changed things.

The recent PR 1.2 firmware update fixed many bugs and added many features, but it also "broke" a trick that Easy Debian folks had been using to get keyboard focus back after returning to LXDE from another app.

A little background: Maemo 5's window manager, Matchbox 2, is very strict about the keyboard focus rules, far, far stricter than any other window managers. They did this for power management reasons. Some people have called this a bug, but others argue that this is the most correct way to do it, and it is the fault of sloppy applications.

Whoever is to blame, there are quite a few apps out there that don't work properly with the N900's window manager. Unfortunately, the Xephyr nested X server that Easy Debian uses to run LXDE inside Maemo is one of those apps. Finding a way to get keyboard focus for Xephyr was one of the first hurdles facing the Easy Debian project when porting to Maemo 5.

The original breakthrough happened when qobi wrote a little "fixer app" that "fixed" non-compliant windows when given a window ID as a parameter. This method gave initial keyboard focus to LXDE when starting up.

Someone discovered a much more elegant workaround, however. All you needed to do was press the power button and then clear the menu by pressing the screen outside the menu, and the current window would receive keyboard focus. This became the standard method for returning to Easy Debian's LXDE after using another app, such as receiving a phone call or taking a picture.

When the long-anticipated PR 1.2 firmware update came, Easy Debian users were dismayed to discover that they couldn't use the power button to get their keyboard back in LXDE. Even worse, that trick made it impossible for the user to hit Ctrl-backspace to get back to the dashboard. The only ways to "break out" of this keyboardless LXDE were to either log out or to open the camera. Not a good situation.

After some hacking, we have managed to get things working again. It isn't as neat as the power button workaround, but it is nearly as good. Now, the same LXDE icon that opens LXDE in the first place also returns you to LXDE with keyboard focus. So you only need to put the Easy Debian LXDE icon (the red diamond with the "d" in it) on your desktop and press it whenever you want Easy Debian LXDE.

If you want this new version (and if you use Easy Debian LXDE, and you have PR 1.2, then yes, you want it), enable the Extras-testing repository and get the update. Please be aware that any other apps that offer updates after you enable Extras-testing may not be ready to be installed, since they may not comply with the community's QA standards.

If you have any questions about Easy Debian, they're probably answered in the the Easy Debian wiki page, but if not, go to the talk thread and ask your question there.

Labels: , , , , , , ,

Friday, March 27, 2009

Easy Chroot for Maemo

I'm going to start this post with a defence of my pronunciation of "chroot" as a single word, not "c-h-root" or whatever. I believe it should be pronounced this way for three reasons:
  1. Unix/Linux commands and computer acronyms are commonly pronounced as words. "grep", which is a contraction of the g/re/p command, is pronounced as a word, as are many even less plausible acronyms. Try saying "s-c-s-i" instead of "scuzzy" in a computer lab and be prepared for the derisive laughter.
  2. I think the chroot command was intended to reference the cheroot, a kind of inexpensive cigar also known as a stogie.
  3. It is much easier to say. Why would you make work for yourself by saying a one-syllable word as two or three syllables?
The rest of this post is a more in-depth technical discussion of my easy-chroot package, targeted at developers, those wishing to easily mount partitions and image files, and those wishing to try out new linux distributions and environments with a minimum of hassle (no rebooting, partitioning, etc).


Easy Chroot: Introduction

I have packaged the scripts for the mount-and-chroot system underlying my Easy Debian package into a separate package I call "Easy Chroot". I have also included the drivers (compiled by Matan for me) to do the "turbo loop," which allows a mounted image file to be accessed at nearly the same speed as a partition.

I have created (with lots of help from lots of people) a set of scripts that are very generic, and can be used independently or together to build and run various kinds of "appliances" or OS replacements, without any direct impact on the host OS.

The Scripts

qchroot:

This is the all-in-one core script.

Provide it with an image/partition, a mount point, and a command, and it will do the rest... (But it runs the commands it is given as root inside the chroot, which is often not what you want. See the quserchroot command, below, to run chroot apps as non-root.)

The first parameter is the image file, the second parameter is the mountpoint, and the rest of the parameters are passed to the chroot and run there. There's a lot of magic going on under the surface here, so let's look at what's going on "under the hood."

The qchroot script can be broken into three parts; mount, bind, chroot. The mount portion is handled by qmount below, so we'll look at the binding and chroot portions.
  • Binding: After a partition or image file is mounted, it isn't very useful for the kind of chroot we want here. A basic chroot is sometimes referred to as a "jail", because applications run in the chroot filesystem can't "see" anything outside of this filesystem. This means none of the devices, media, temp directories, nor even the user's home directory can be accessed while "inside" the chroot. That's why a careful use of the "mount -o bind" command is required. It mounts directories from the parent OS in the chroot, too, so applications in the "chroot" can "see" them. Mounting the /dev directory makes most of the devices connected to the system visible, and mounting everything under /media allows the chroot access to SD cards and attached external media such as USB drives. This also allows chroot apps to share the X display and desktop manager, so they appear to be running on the Maemo desktop. The qchroot script also mounts the various temporary directories, so that applications can communicate with applications in the parent OS. This means GTK apps inside the chroot can invoke Maemo's stylus keyboard when a text field is tapped. It also means a chroot app can open an e-mail attachment from Modest.
  • Chroot: This is the primary purpose of all of these scripts, and in the end, it is one of the most simple and straightforward parts. The qchroot script makes sure that exiting the chroot, however that happens, resets things gracefully as possible, but the actual chroot is a simple one line command. It really is the mounting and the binding that make the chroot a workable virtual environment.
userchroot: The userchroot script is only a thin wrapper around qchroot. This script, however, isn't run as root; in fact it will fail unless it is run as non-root. The userchroot script inserts an extra "su user -c" before the commands to be executed inside the chroot. It takes the same parameters as qchroot.

For example, let's say you have an image file on your SD card containing, among other things, OpenOffice.org. You would run the following command (as user, not root) to open a document in oo writer:
userchroot /media/mmc1/ubuntu-ooo.img.ext2 /opt oowriter "/home/user/MyDocs/resume.doc"
Hey! Look at that splash screen! You're starting up OpenOffice Writer!

qmount: This script does some serious heavy lifting. It is called by qchroot to mount the image file or partition. It takes the first two parameters of the scripts mentioned above; the image/partition name and the mountpoint. A lot of my best scripting is in here, and this is also where I needed the most help from outside.

The qmount script checks to see what it is you are trying to mount, and if you are mounting an image file (a file that contains a filesystem, like an ISO file, except it is read/write), it will use the dmlosetup app (thanks Matan!) to mount the image file; this improves read/write speed dramatically, and makes the image file almost as fast as a dedicated partition.

You can use this script to mount an image or partition, if all you want to do is mount it (and not chroot into it). A partition mounted with qmount is not suitable for chroot however.

closechroot: This script is one of the best things about running applications in a chroot. By running this script, you can kill all of the chroot applications in one blow. No hunting around trying to find stray processes. The closechroot script is also very important to run if you want to delete or move the image file that you have mounted, because the dm-loop doesn't "let go" of the image file when you just unmount it.

The closechroot script takes one parameter, the directory where the chroot is mounted. It then kills the chroot applications, unmounts all of the bound directories, and then unmounts the image file or partition that you mounted.

qumount: This is the script that does the unmounting for closechroot. It can be used independently if all you want to do is unmount a partition or image file. Don't use qumount to unmount a fully mounted chroot, however.

synchroot: This script doesn't need to be run very often. It copies several configuration files from the primary system to the chroot, so that the two environments are "synched". This is important for things like time, user permissions, keyboard mapping, and networking. The files that are copied are the following:
  • /etc/hosts
  • /etc/resolv.conf
  • /etc/group
  • /etc/passwd
  • /etc/localtime
  • /usr/share/X11/xkb
The files in the chroot are backed up with a date-based extension, so you can restore your chroot file system if synchroot breaks something.

Some Support Hacks

There are a few extras thrown into the easy-chroot package to make it easier to run non-hildon applications. Here's a quick overview of them.

Movable Dialogs Hack
: Thanks to qwerty12 and Matan, you can set your dialogue boxes to be either movable or static (the default). Movable dialogues are often needed when running desktop applications which can have huge dialogue boxes for settings, etc.

Processor Speed Hack: Thanks to lcuk and others, the /sbin/cpu-ondemand and /sbin/cpu-perform scripts (and associated menu items) set your processor to either "on demand" mode (processor speed drops when cpu is idle) or "performance" mode (processor speed is locked at full speed). Due to very aggressive definitions of "idle" in the Maemo system, the processor often scales back to half speed when it isn't appropriate. This can have a noticeably negative impact on processor intensive applications (like Gimp and OpenOffice, etc). By setting the processor to "performance", you can dramatically speed up many of these big, slow applications.

Host Window Hack: Thanks to Bundyo, this little app (/usr/bin/hostwin) can be used with the Xephyr nested X-server to run a secondary desktop (yes, a complete desktop, like Gnome, or KDE, or anything) as a window on your primary Maemo desktop. See the link above to the ITT thread discussing the program's use.

Installing The Package

easy-chroot can be found in the diablo extras repository. Install with the Application Manager or apt-get install easy-chroot or make it a dependency of your project.

Labels: , , , , , , ,

Thursday, March 19, 2009

E17 Illume on N800


The Enlightenment project is a lightweight desktop environment and a bunch of supporting libraries (which are used in projects like Canola). The Illume module is a new Enlightenment desktop "that modifies the user interface of enlightenment to work cleanly and nicely on a mobile device." E17 is the newest, still-in-development version of Enlightenment.

Nathan "Neato" Jones got E17 Illume running on the tablets under Mer, and then he gave us good instructions to try it ourselves. And he even posted an annotated video of Illume in action!

I fired up an Ubuntu Jaunty chroot on my tablet, installed the E17 builder-installer script, and after many hours of compiling the entirety of E17 on-tablet and two SVN versions, I got a working version!

I then used my Xephyr-on-Maemo trick (the trick I used in Easy Debian to run IceWM and LXDE on top of OS2008) and, from within OS2008, I tried out the interface in both portrait and landscape mode.

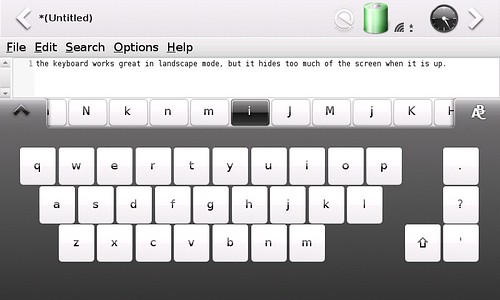
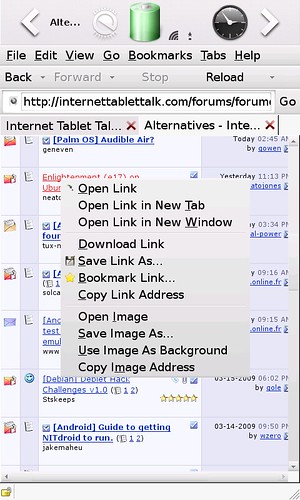
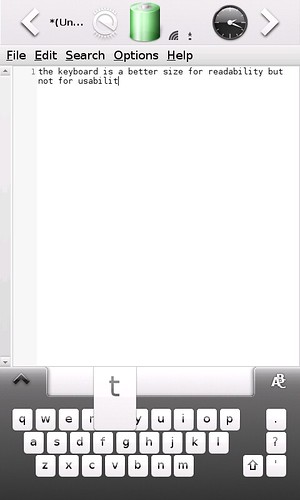
Here are some screenshots of portrait mode:


The browser is Epiphany, using the Mozilla engine. The text editor is Leafpad.

I have to say the on-screen keyboard is much too big for landscape use, and too small for portrait use. I found this frustrating. I also found it frustrating that there was no way to "log out" of E, I had to kill the X-Server or reboot the tablet to get out of it.

My final opinion (and Nathan seems to agree) is that the E17 Illume desktop has a lot of potential as an interface for the tablets, but it is still a work in progress and there are a lot of rough edges to be taken off.

Labels: , , , , , , ,

Tuesday, February 24, 2009

Qole's Notes: Building an Easy Mer / Ubuntu Chroot for the NIT

Mer Midori running in OS2008 Diablo via chroot

Why Mer?

I've been wanting to set up an Ubuntu chroot in the style of Easy Debian. I've decided to use the Mer 0.8 rootfs because:
  • Mer is based on Ubuntu Jaunty, which is my current distro of choice, mainly because it has the newest Open Java6 JDK.
  • The Mer developers have clearly been working to slim down the big Ubuntu footprint; consequently, the image is much smaller than a comparable Jaunty image.
  • The Hildon Input Method works automatically with GTK apps; this means the stylus keyboard pops up when I tap an input field in a GTK app.
  • Midori, a great little GTK WebKit-based browser, comes bundled. Not only that, but they've managed to get some Hildonization done by the developer!

Qole's Notes

Here are my notes for customizing the Mer 0.8 rootfs to run in my chroot.

I have the rootfs set up in a partition on my SD card, and I'm using my Easy Debian package to do the actual chroot.

I'm posting these so I can set things up quickly in the future. Hopefully someone else finds something of value here too.

Configuring the Chroot

Some basic configuration needs to be done, right off the bat. First, from the Maemo prompt:

sudo closechroot
touch /home/user/.synchroot


Then, as root inside the chroot:

mkdir -p /home/user
chown user:users /home/user


This will copy some Maemo config files into the chroot and make a home directory for "user".

Default Ubuntu Shell

The shell defaults to "dash" as opposed to "bash". As explained here, this was a decision by the Ubuntu team to improve boot speed. Boot speed is not relevant in a chroot, so I repoint /bin/sh to bash instead of dash. Inside the chroot:

rm /bin/sh
ln -s /bin/bash /bin/sh


I don't like this solution very much; it will make the system much slower booting (if you wish to boot to it). I'm going to see about leaving dash symlinked and purposely calling bash when a chroot terminal is requested.

Setting Locale:


Changing locales in Ubuntu is ugly, even "broken," as described here. This is what I do (from within the chroot) to get en_GB (my Maemo locale) set up in the chroot. From within the chroot:

cat /usr/share/i18n/SUPPORTED | grep en_GB
vim /var/lib/locales/supported.d/local
dpkg-reconfigure locales


Hardware Key Hacks / GTK Stylus Setup

Now it's time to get the pieces needed for my fullscreen and on-screen keyboard hacks. From within the chroot:

apt-get update
apt-get install matchbox-keyboard wmctrl xbindkeys libgtkstylus


I use xbindkeys, wmctrl, and Matchbox-Keyboard to do "fake hildonization;" by running xbindkeys, I can map the hardware key combination "-" and "fullscreen" to make any app fullscreen, and "-" and "menu" to toggle the Matchbox keyboard.

Boy, Ubuntu's version of Matchbox keyboard is ugly. What's with the shaded keys?

The libgtkstylus on the end there lets the user use tap-and-hold for right-click within GTK apps.

Adobe Flashplayer

Now I install Stskeep's Adobe flashplayer hack, to allow Flash to work in Midori and other browsers. In maemo root terminal (with chroot mounted):

cd /root
wget http://qole.org/files/deblet-flashplayer.tar.gz
tar xzvf deblet-flashplayer.tar.gz
cd flashplayer
leafpad flashplayer.sh

(change the CHROOT value to point to the directory where your chroot is mounted & save)
./flashplayer.sh

That should configure most Ubuntu browsers to use the maemo Adobe flash plugin.

OpenJDK (Java 6)

apt-get install icedtea6-plugin (This wants to pull in all sorts of unnecessary language fonts; I had to add all the ttf pkgs to the install line, followed by "-" for each, eg ttf-baekmuk- ttf-bengali-fonts- ttf-kannada-fonts- etc...)
sudo debian update-java-alternatives -s java-6-openjdk
sudo ln -s /usr/lib/jvm/java-6-openjdk/jre/lib/arm/IcedTeaPlugin.so /ubuntu/usr/lib/firefox-addons/plugins/libjavaplugin.so

Test the install here:

http://java.sun.com/applets/jdk/1.4/index.html

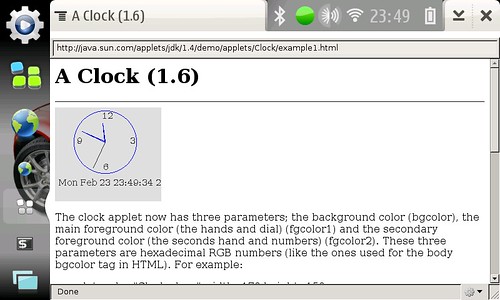
There currently doesn't seem to be a way to get OpenJava6 to run in Midori. I installed Mozilla Prism to to test Java. It seems to be the lightest-weight Java-capable browser available for the tablet. From within the chroot:

apt-get install prism

Prism running a simple demo Java applet

DBus

Getting maemo / chroot dbus processes to talk is proving to be a challenge...
Maemo doesn't seem to keep the machine id in /var/lib/dbus/machine-id, which is where most dbus-aware apps expect it to be. So far, I've found the following seems to work. In a maemo root terminal (after starting the chroot in /ubuntu) [1]:

dbus-uuidgen --ensure
mount -o bind /var/lib/dbus /ubuntu/var/lib/dbus


This seems to make DBus work; the Mer osso-xterm from maemo will respect the existence of maemo's osso-xterm. The only way to start Mer's osso-xterm is to close maemo's version first.

I've got to make this more permanent. I have to do the mount -o bind command every time I start the chroot (after closechroot or reboot).

Other Problems

The stylus keyboard doesn't work in Midori's web pages, only in the address bar. This is true for any GTK browser. The widgets within the web page are not GTK widgets, so no Hildon Input Method activation. Java doesn't work in Midori, and Prism is a very stripped-down browser, with a very bare interface. Sadly, even installing xulrunner Gnome support doesn't help with making it more stylus friendly. Is there nothing like MicroB out there?

Theme problems: There's got to be a way to get the chroot and maemo sharing theme information and icon info, too. This is certainly a difficult problem. Perhaps the simplest solution is to install the same theme into both maemo and mer.

Dash-vs-Bash: I've gotta figure out a way around this...

Extra apps

Leafpad is my favorite lightweight text editor. It works great in this chroot, because it is completely GTK, so the stylus keyboard and tap-and-hold right-click work fine.

Gnome ALSA mixer
is a nice addition. It is not included in the tarball below, but it is easy to install, and it doesn't pull in a huge number of dependencies.

Future: I want to experiment with Fennec Alpha 2 (+24.3 MB) and Abiword 2.6.6 (+53 MB), and see how they work in this environment. I also would like to try the E17 desktop.

Downloadable rootfs tarball

Here's a tarball of the mer 0.8 chrootfs with all of the above already completed (158 MB).

Updates
25-Feb-09: Here's what I've discovered so far:
  • Fennec doesn't do Flash (even though it sees the plugin, it doesn't actually show the Flash) and it is somewhat unstable. I can't select text; if I drag, it just drags the page. If I double click, it zooms.
  • Abiword works, and it uses Hildon Input Method. It seems to have problems loading files, however, often opening an empty "Untitled" file instead of the chosen document. It also is a bit wobbly; it crashed once on me.
  • I can make the stylus keyboard pop up in most Mer apps (where it doesn't pop up by itself) by pressing the centre d-pad key.
01-Mar-09: Getting themes to work:

I've found a two-step way to get the theme to work in the chroot.
  • Edit /home/user/.gtkrc-2.0 and comment out any theme-related lines. Add the following line:
include "/usr/share/themes/liberty/gtk-2.0/gtkrc"
  • Start the sapwood theme server inside the chroot (as user, not root). I have no idea why it doesn't share the running sapwood server in Maemo; probably Nokia's version is proprietary somehow.
/usr/lib/sapwood/sapwood-server &
If you want to maintain a consistent theme throughout, then you need to install the same theme in OS2008 and the chroot. So far, this seems to be limited to the Titan theme, since the Liberty theme isn't available for OS2008 and Titan is the only third-party OS2008 themes in the Mer repository at the moment.

I will post updates as I discover more.

Labels: , , , , , , , , , , ,